Neural Analog guide
Start hereUse playback, versions, and sources in Studio
The full song, processed versions, and stems stay aligned on one timeline. These are the controls you need before running a model.
Main track and stem rows
- The top row is the full-song main track.
- Stem rows appear below it after extraction or stem import.
- Each row has its own version menu. Stem rows also have S (Solo), M (Mute), level, and FX.
- Restored versions are orange, mastered versions blue, and MIDI versions yellow.
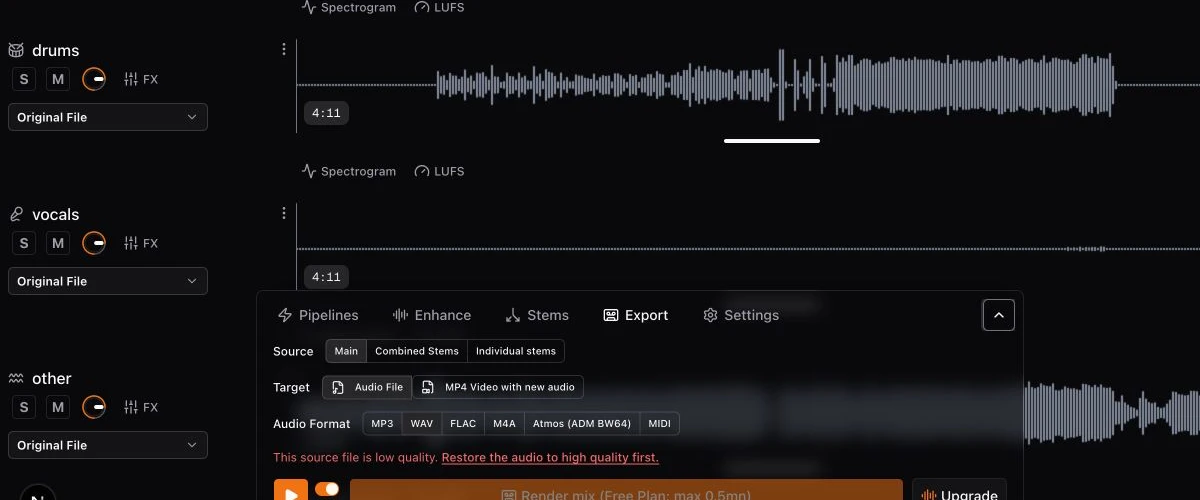
Playback actions and shortcuts
| Action | Result |
|---|---|
| Press Space | Play or pause. The shortcut is ignored while typing in a field. |
| Use the main/stems switch | Play the main track or the current audible stem mix. |
| Double-click a waveform | Seek and start/pause playback. On a stem waveform, this also selects that stem. |
Select audio on the waveform
- Drag across the waveform to select the section a compatible job should process.
- Click outside a normal selection to clear it.
- A click moves playback; it does not create a region.
Prompt regions for Stable Audio 3 and SAM Audio
These models can use one or more specially marked regions to target an edit or inpainting instruction inside the song. Hold Ctrl while dragging on Windows/Linux, or Command while dragging on macOS, to create a prompt region instead of changing the normal processing selection.
To remove one, hold the same modifier and click the prompt region: Ctrl+click on Windows/Linux or Command+click on macOS.
Use the Process panel
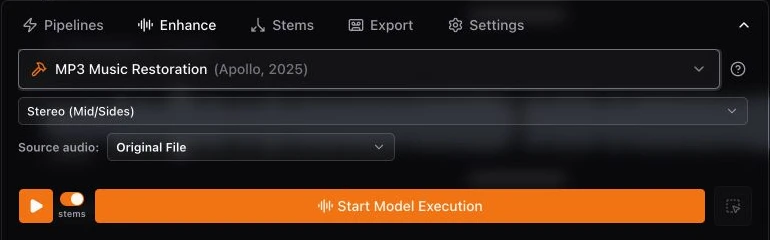
The Process panel sits at the bottom of Studio. It is where you choose what to run, which audio should be used, and how to export the result. Selecting the main track exposes full-song workflows; selecting a stem makes that stem the active processing context.
- Pipelines: run a complete multi-step workflow, such as Restore and master, Atmos preparation, or Transcribe Stems to MIDI.
- Enhance: run one restoration, mastering, generative, or transcription model on the selected source.
- Stems: split the main source or import stem files you already have.
- Export: download Main, Combined Stems, or Individual stems in the available formats.
- Settings: control track visibility, render bit depth, streaming format, and MIDI playback soundbank.
Realtime FX and current-mix sources
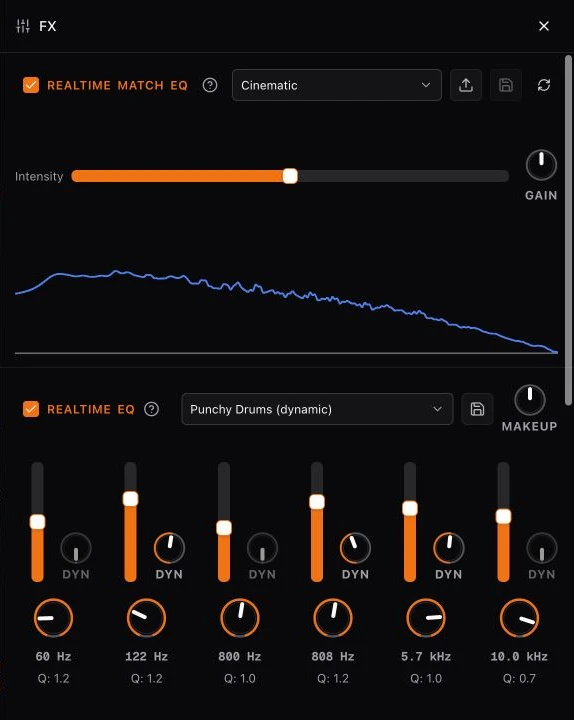
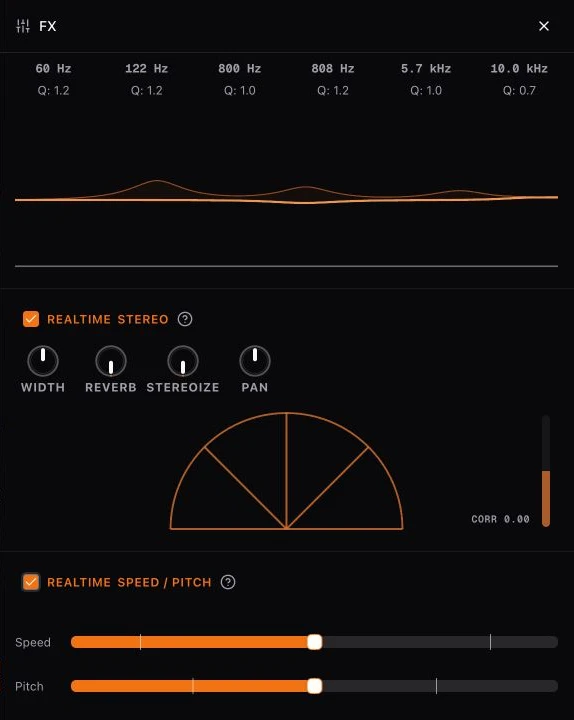
Click FX on the main track or a stem to open its realtime effects. Changes are heard immediately and do not create a new stored version.
- Match EQ: shapes the track toward a reference preset; Intensity controls how strongly it matches and Gain sets the output level.
- EQ: boosts or cuts six frequency bands. Dynamic controls make a band react to the signal, and Makeup adjusts the final level.
- Stereo: controls width, reverb, stereoization, and pan; the scope and correlation meter show the resulting stereo image.
- Speed / Pitch: changes playback speed and musical pitch independently.
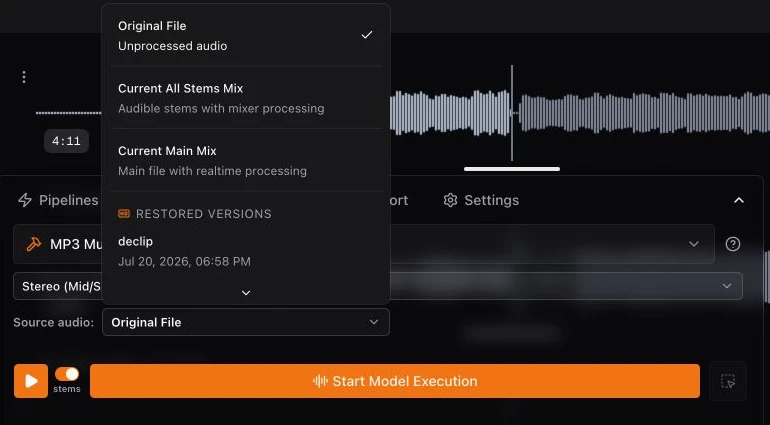
To run a model on the state you are currently hearing, choose the matching current-mix source in the Process panel:
- Current Main Mix: main file with realtime processing.
- Current All Stems Mix: audible stems with mixer processing.
- Current Stem Mix: selected stem with realtime processing.
Use the Before/After slider
- Select a processed version and start playback.
- Move fully to Before for the original source and fully to After for the selected result.
- Middle positions blend both versions; use the endpoints for a direct A/B comparison.
- If you export while a blend is active, Studio renders that blend in the final file. The export matches what you hear.
